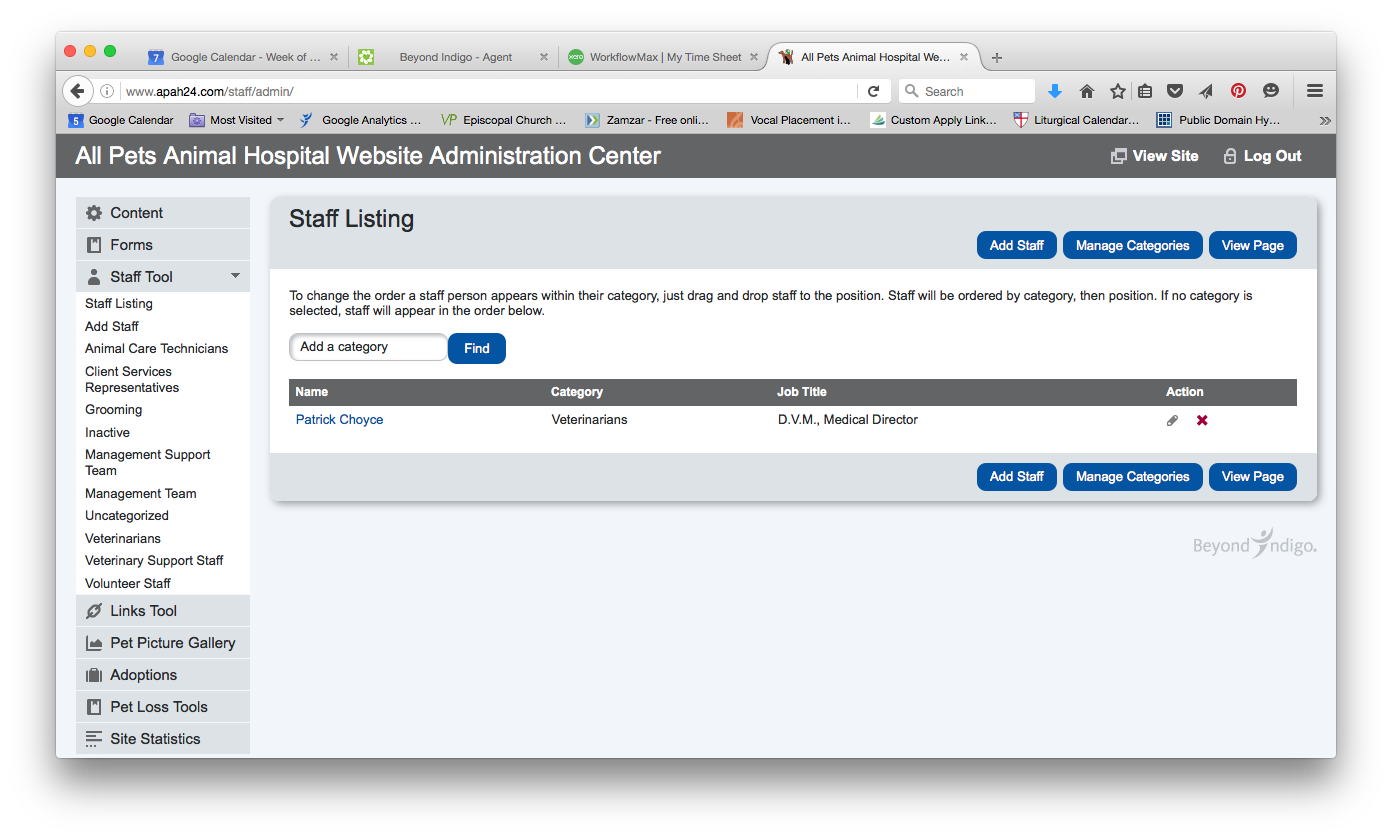
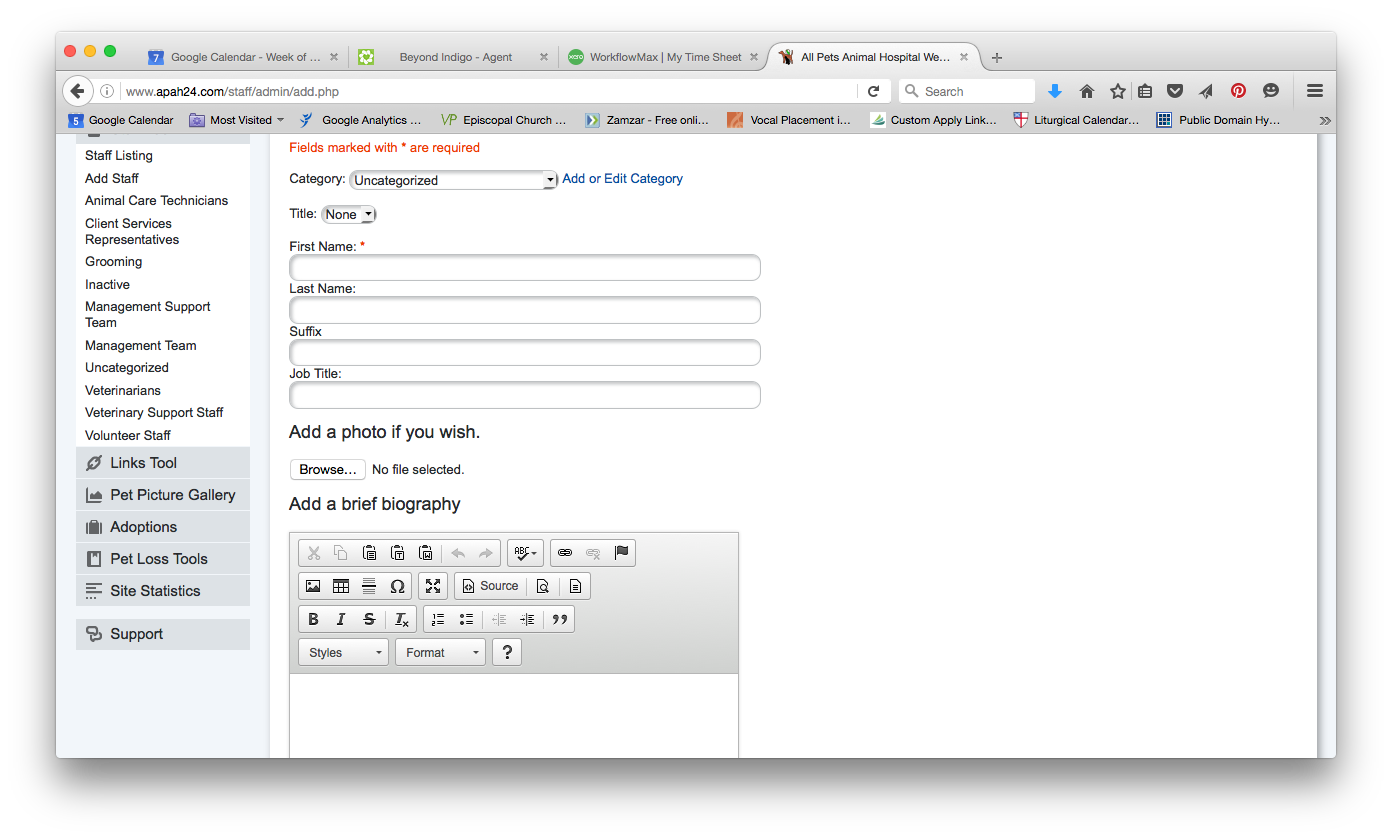
Using the Staff Tool from the Admin Panel interface is extremely easy. All you need to do is have your bio and picture ready and you'll be able to enter in all the information you need immediately. Pictures should be in JPG or PNG format and should not be larger than 400 x 600 pixels (medium quality). The larger the format, the longer it will take to upload and you may end up needing to resize it with a graphics program.Here are some specific instructions with screen shots:
1. Log into your Admin Panel
http://www.[yourdomanname]/admin/
2. Click on 'Staff Tool'

3. Click on 'Add Staff'
4. Adding the staff person
Select the Category that the staff person belongs to.
Enter their Name on the First Name line
Enter their bio in the text box labeled "Add a Brief Biography"
To add a picture, hit the "Browse" button under "Add a photo if you wish."
When you are finished, hit the "Submit" button.

Editing and removing staff
If you want to remove an existing staff person, hit the red "x" mark to the right of their listing on the main Staff Tool screen. If you want to edit their listing or change their photo, hit the small graphic that looks like a pencil to the right of their listing.
I want to keep their info but remove them from the website for now (maternity/paternity leave, extended absence, etc.)
Go into the staff member's listing and change their Category to "Inactive" this will allow you to keep all of their information in the database, but it will not display on the website. When you want their listing to go live again, simply change their category from "Inactive".
Comments
Please sign in to leave a comment.